Make an auxiliary soldier’s shield
In this activity, your class will learn about the differences between legionary and auxiliary soldier’s shields and explore some of the designs of shields used by Roman soldiers. They can then have a go at designing and creating their own auxiliary soldier’s shield.
Download: Make a Roman Soldier’s Shield PDF resource (3 MB)
If you were a soldier in the Roman army, your shield would be very important to you. When
you were fighting enemies armed with swords and spears, your shield offered much needed
protection.
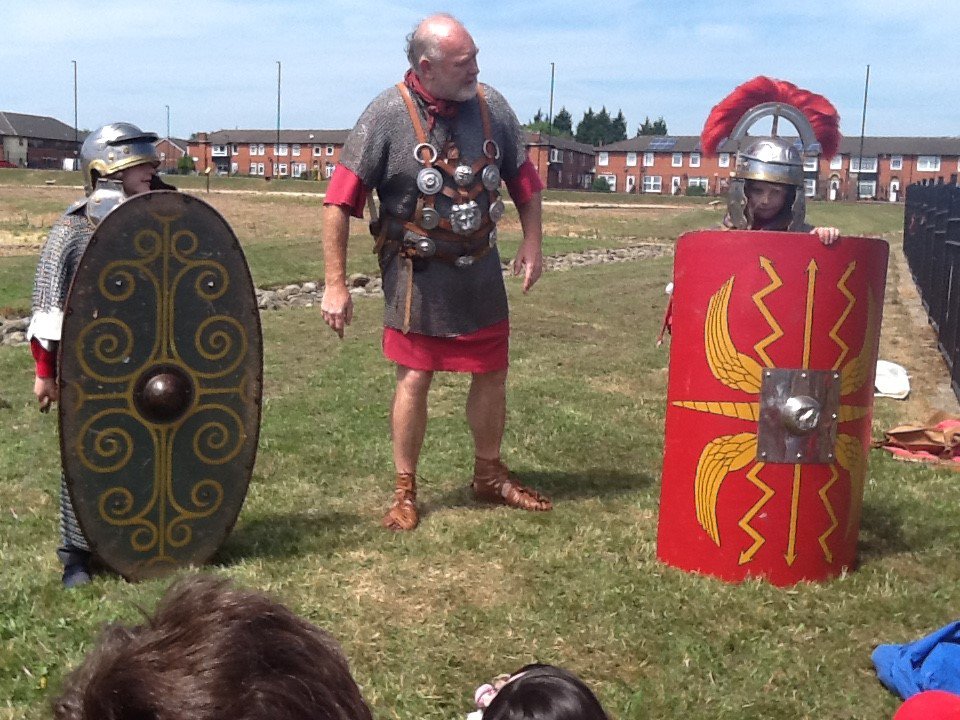
The Roman Army was divided into two different elements - the auxiliaries and the legionaries.
To be a legionary soldier, you had to be a Roman citizen. Legionaries were expected to fight, but they also built essential facilities such as forts, bridges and roads.
Auxilia means help and so auxiliary soldiers assisted the legionaries by providing extra manpower and, in particular, specialised fighting techniques. They were non-Roman citizens, but received their citizenship after being a soldier for 25 years.
The legionary soldiers had curved rectangular shields, whereas the auxiliary soldiers tended to have oval shaped shields.
Both shields had a bulge on the front, called a boss, made out of iron or bronze to protect the hand holding the shield. Whether you were left or right-handed, shields were always held in the left hand when the soldier was fighting.
If you were a soldier in the Roman army, your shield would be very important to you. When you were fighting enemies armed with swords and spears, your shield offered much needed protection.
Roman soldiers would paint their shields with something that was important to them or to their unit.
Create your own shield
Why not have a go at creating your own design for an auxiliary soldier shield below - try and keep your design bold and simple (as you want your enemy to see it from afar).
Materials:
- Card (Thick card such as a flattened cardboard box works best)
- A paper or foil plate
- A small piece of tin foil
- Glue and tape
- Scissors
- To decorate: pens, paint, crayons, coloured paper, old comics or magazines, leaves or petals
Step 1
Draw a long oval shape onto your cardboard, then cut it out with scissors.
Step 2
Draw around a paper plate onto some tin foil and cut the foil out. Keep the foil to one side, you will use this later to decorate your shield boss.
Step 3
Glue the paper plate to the centre of your shield to make the shield boss.
Step 4
Use paint, coloured pens, crayons or coloured paper to decorate your shield.
Step 5
Glue the tin foil over the paper plate and then add any extra decoration.
Step 6
When you’ve finished decorating, turn your shield over and add a strip of card to the back to make a handle. Tape the handle securely in place.
Step 7
Now it’s time to practise your Roman soldier drill!
Challenge!
How long can you march on the spot with your shield for? New recruits to the Roman army had to complete 25 mile marches in 5 hours!
Practise your Roman drill
Using your shield, try out some of these Latin commands to make your own drill in teams. You could add in extra orders, such as drawing swords and thrusting spears. Will you impress the Commanding Officer?
Intente (in-ten-tay) - Stand to attention!
Exspectate (ex-spec-tah-tay) - Wait for it!
Procedite (proc-ed-ee-tay) - Go forward!
Consistite (con-sis-tee-tay) - Stop!
Ad hastam (ad has-tam) - (Towards the spear) go right!
Ad scutum (ad scoo-tum) - (Towards the shield) go left!
Laxate (lax-ah-tay) - At ease!